Importing Transactions
Bliss supports CSV and XLSX imports with automatic format detection, AI classification, and deduplication.
The Smart Import flow
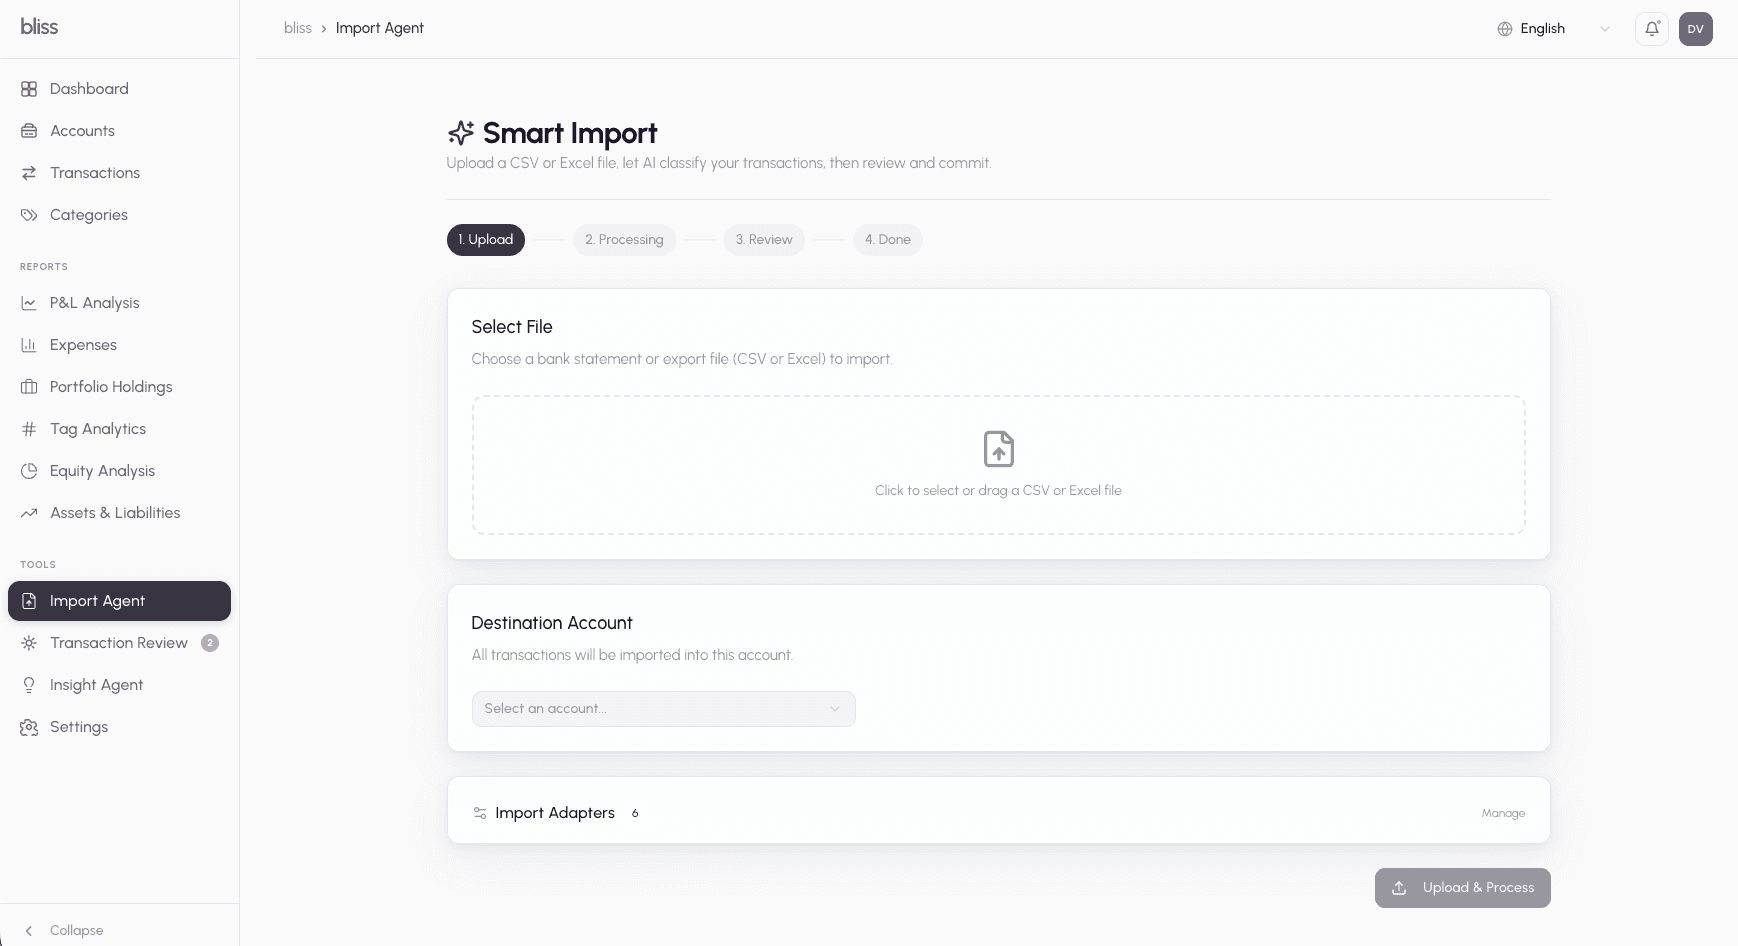
- Upload — Drag a CSV/XLSX file into the import page and select a destination account.
- Processing — The backend detects the file format, deduplicates against existing transactions (date-range-scoped SHA-256 hash), and classifies each row with the 4-tier AI pipeline.
- Review — Inspect classifications, correct any mistakes, and approve rows.
- Commit — Confirmed rows become transactions. Corrections feed back into the AI model.
Tip: For your first import, start with a small batch (a single month or a hundred rows) and review the classifications carefully. Each correction trains the AI on your specific merchants and habits, so subsequent larger imports arrive with far higher auto-classification rates.
File format detection
Bliss matches your file’s column headers against known adapter signatures. If a match is found, it auto-maps columns. If not, you create a custom adapter.
Preconfigured bank adapters
Bliss ships with 30+ preconfigured adapters that automatically recognize CSV exports from major banks worldwide. Just upload your file and Bliss will detect the format:
| Region | Supported banks |
|---|---|
| US | Chase, Bank of America, Citi, Capital One, American Express, Discover, US Bank |
| UK | HSBC, Barclays, Lloyds, Monzo, Santander UK |
| Spain | BBVA, CaixaBank, Santander |
| France | Boursorama, Credit Agricole |
| EU | N26, Revolut, Wise |
| Brazil | Nubank, Itau |
| Canada | RBC, TD Canada |
| Australia | ANZ, Commonwealth Bank |
| Brokerages | Interactive Brokers, eToro |
Two generic fallback adapters (Date/Description/Amount and Date/Description/Debit/Credit) cover banks not listed above, as long as their CSV uses standard column names.
Bank not listed? Create a custom adapter in seconds — see below.
Creating a custom adapter
When Bliss can’t recognise your file’s format, it shows an “Unknown Format” alert along with a preview table of up to 3 rows from your file — so you can see exactly what Bliss is reading before you configure anything.
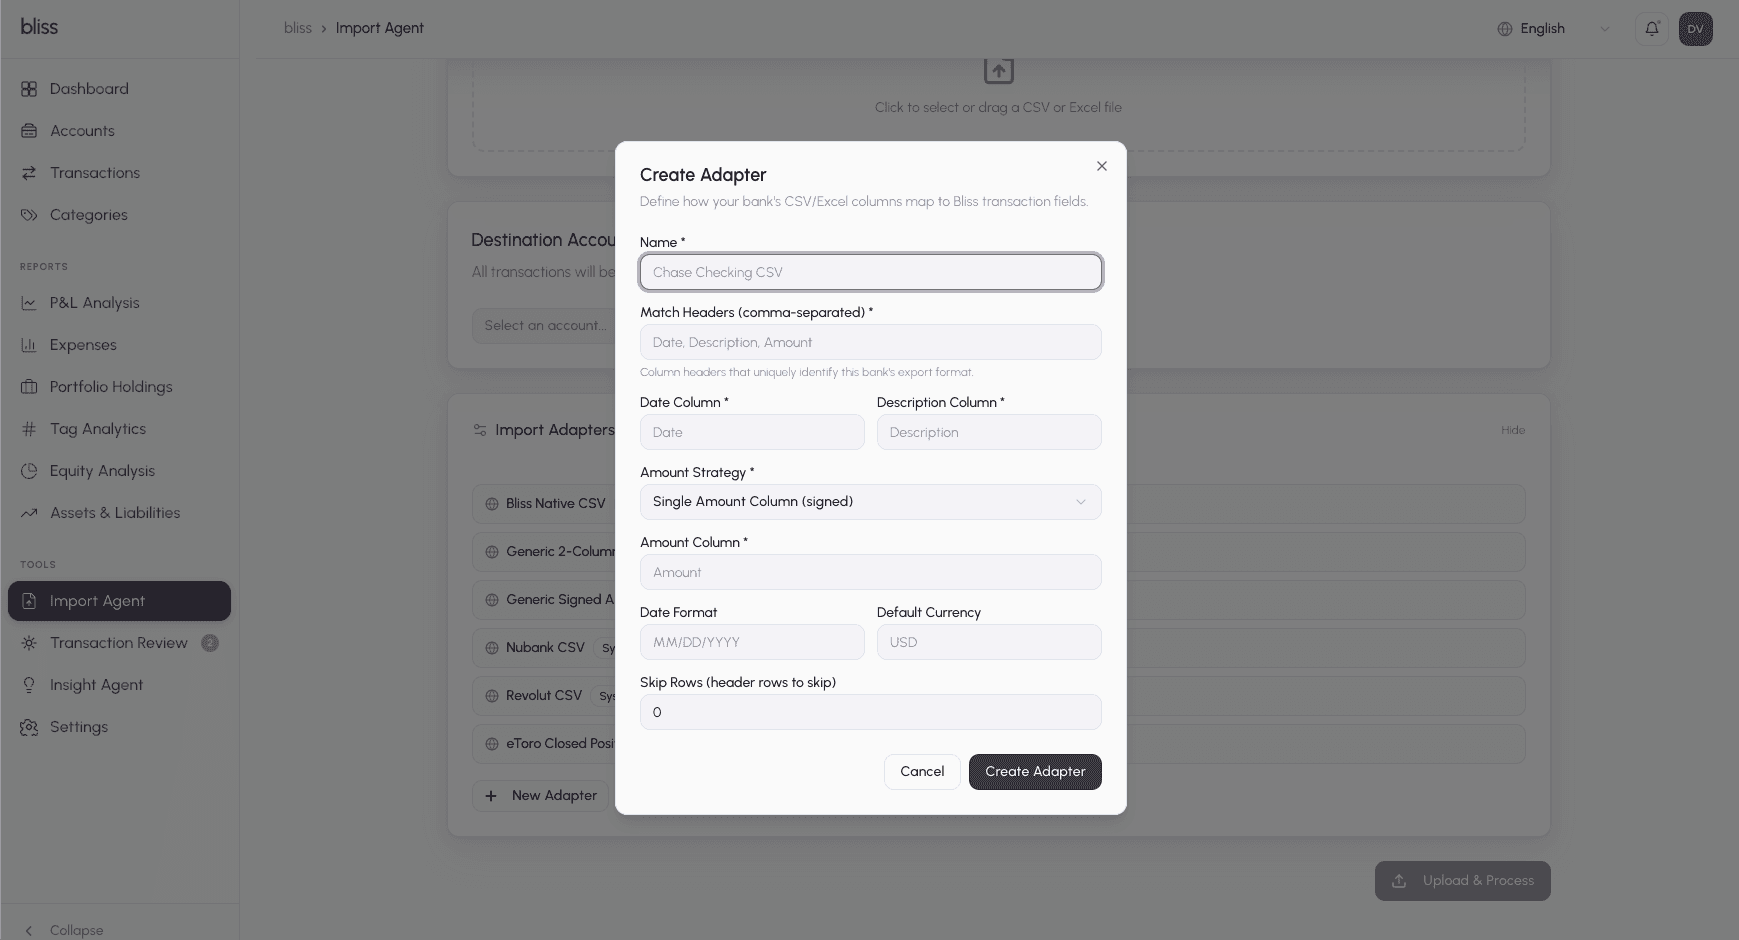
Click “Create Adapter for this Format” (or Import Adapters → New Adapter) to open the adapter form. Bliss pre-fills the form using the headers it detected, so you mostly just pick values from dropdowns rather than typing column names by hand.
Match Headers
Detected column names appear as removable chips. You can click × on any chip to remove it, or type a new name and press + to add one. These are the headers Bliss will look for in future uploads to identify this file format automatically.
Column mapping
Each field (Date, Description, Amount, etc.) shows a dropdown pre-populated with the headers from your file. Just pick the right column for each field.
Amount strategy
Choose how amounts are encoded in your file:
| Strategy | When to use |
|---|---|
| One column (positive/negative) | One amount column; negative values are expenses |
| One column inverted (Amex-style) | One amount column; positive values are expenses (some US cards) |
| Separate debit/credit columns | Your bank uses two columns — one for money in, one for money out |
| Amount + type column | One amount column plus a separate column that says “debit” or “credit” |
Date format
Pick from common presets (e.g. DD/MM/YYYY, YYYY-MM-DD, MM/DD/YYYY) or choose Auto-detect to let Bliss figure it out. You can also enter a custom format string.
Row preview
As you adjust settings, the Row Preview card at the bottom of the form updates in real time to show how the first row of your file will be parsed — date, description, amount, and currency. Use this to catch mapping mistakes before saving.
Default currency
Select the currency to apply when your file doesn’t include a currency column. Leave blank to inherit the destination account’s currency.
Adapters are saved per-tenant and reused automatically on future imports.
Bliss Native CSV format
For maximum control, prepare your data in the Bliss Native format. This bypasses adapter detection and supports all fields including investments and tags.
Required columns:
| Column | Description |
|---|---|
transactiondate | Date in YYYY-MM-DD format |
description | Transaction description |
debit or credit | Amount (at least one required) |
account | Account name (must match an existing account) |
category | Category name (must match an existing category) |
Optional columns:
| Column | Description |
|---|---|
currency | ISO code (e.g., USD, EUR). Defaults to account currency |
details | Additional notes |
ticker | Stock/ETF symbol — triggers investment metadata lookup |
assetquantity | Number of shares/units |
assetprice | Price per unit |
tags | Comma-separated tags (e.g., vacation,2024) |
Example:
transactiondate,description,debit,credit,account,category,currency,ticker,assetquantity,assetprice,tags
2024-06-15,AAPL Purchase,5000,,Schwab,Stocks,USD,AAPL,25,200,
2024-06-15,Salary,,8500,Revolut Daniel,Salary,EUR,,,,"income,june"
2024-06-16,Grocery Store,45.80,,Nubank,Groceries,BRL,,,,
With Native CSV, rows skip AI classification entirely — accounts and categories are resolved by name.
Review and commit
After processing, review the staged rows. The AI assigns a category and confidence score to each row. You can:
- Accept individual rows or in bulk
- Override the category with a correction (this trains the AI for future imports)
- Skip duplicates or irrelevant rows
- Tag a row directly in the review drawer — add existing tags or create new ones on the fly, no need to wait until after commit
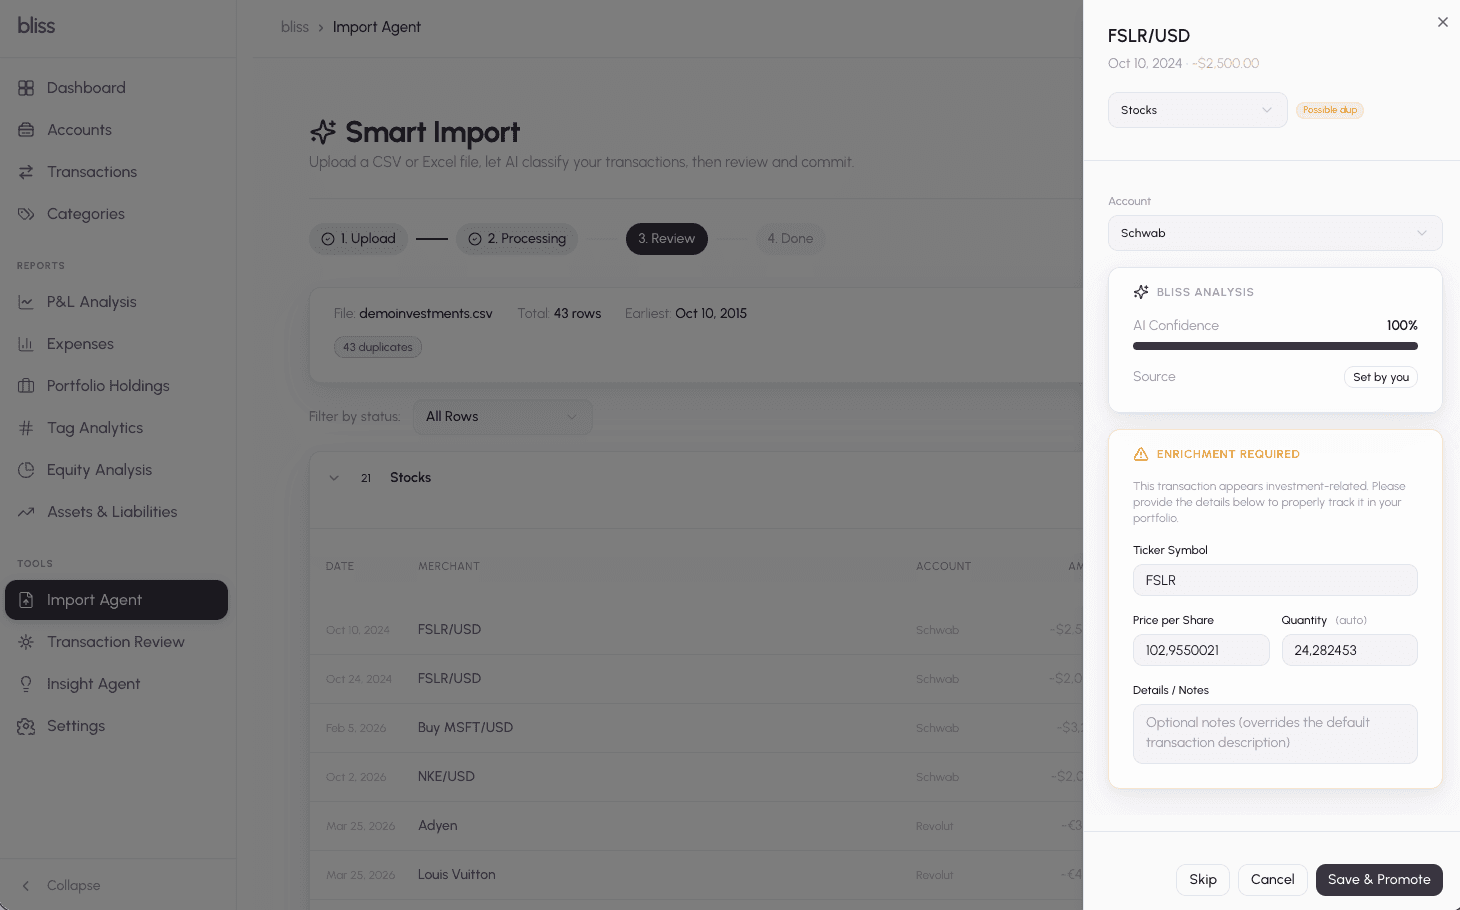
Rows with confidence above your autoPromoteThreshold (default 0.90) are auto-confirmed.
Next steps
- Investment portfolios — how investment transactions are processed after import
- AI classification — understand the 4-tier pipeline